How To Replace an RV Awning Spring
Special note:
This step by step guide contains instructions for the A&E awning. Other brands are similar and all
precautions apply.
There is considerable stored energy in the springs that can cause serious
injury - if you are not completely sure of your abilities DO NOT attempt to repair
the awning. Most RVawning repairs are best left to a competent RV technician!
The content of this webpage is for informational purposes only. I wish to stress again that when attempting RV
awning repair the spring pressure must be controlled at all times.
1. Roll the awning all the way out to full extension. 
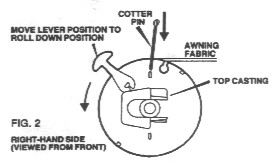
2. Pin the opposite awning spring with a cotter pin.

3. Extend both awning rafter arms and lock them into place and tighten the hand screws. This helps hold everything
in place.

4. Mark the position of the ratchet end assembly with respect to the awning tube. (note the position of the release
lever)
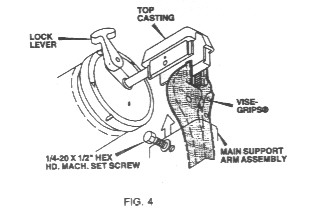
5. Attach the vice grips onto the ratchet assembly end cap and hold firmly. (I stress again that the spring tension
is a force that must be controlled. This tension is not overly extreme, but it can inflict serious harm. Remain in
control of the tools used and you will be okay)

6. Remove the bolt that holds the end cap to the awning arm, lift the awning and end cap out of the awning arm
(while a helper supports the awning) and rotate the vice grips to relieve the tension of the spring, noting how
many turns it takes to do this.
7. Drill out the rivets that hold the ratchet end cap assembly, pull out the assembly, and insert the new assembly
in the correct position. (as noted in step 4) and rivet it in place.
8. Attach the vice grips to the new ratchet assembly and rotate as many turns as noted in step 6. Remember, you are
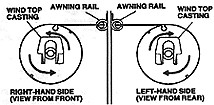
adding the initial turns to the turns that the awning gets as it unrolls. Turn the spring "top away" from the
coach.

9. Reinsert the end cap into the awning arm and install the bolt.
10. Remove the cotter pin that was installed in step 2, place the roll out lever to the retract position and roll
up the awning.
See also: